Learn To Craft at Microsoft

ApprenticeshipA few weeks ago I was able to attend an event hosted by Microsoft France about the software craftsmanship movement named “Learn to craft“. This presentation was made by Jean-Laurent Morlhon, Bruno Boucard and Thomas Pierrain.

Even if I already read a lot about the topic (I went to some meetups about software craftsmanship and I went to a conference), I was glad to have the opportunity to go to this event, you never know what you might learn.

Presentation

At the beginning there was a presentation of the software craftsmanship movement, its origin, its values, its goals. I will not go into the details, you can learn more here. I was just surprised that there was no mention of the manifesto, not that I believe that it should be signed, I let you decide whether you want to sign it or not.

What I like about the manifesto however is the fact that it shows a close relationship with the manifesto for agile software development, which in my opinion is an important aspect: Software Craftsmanship is part of the agility movement, with a big focus on technical aspects.

swcraft

TDD & Pair Programming

After this presentation Bruno and Thomas put their hands on the keyboard in order to show us a pair programming session while doing Test Driven Development (TDD). This exercise aimed to show us how to go through each step of the Red-Green-Refactor loop of TDD but also how to collaborate as a pair.

In a pair communication is key, both developers have to think about the problem they are trying to solve and they exchange a lot. Now the question you might have is how to equally share the keyboard in a pair programming session, well the TDD approach is helpful to solve this case.

What you can do is: one of the two developer starts by writing a failing test (red), make it pass (green), refactor the code if necessary (refactor), write a new failing test (red) and give the keyboard to his partner. This developer now has to make the test pass (green), do the refactoring and write a new failing test (red), at the point the first developer take the keyboard back to continue the implementation. And repeat this pattern every iteration (or two) to share the keyboard as much as possible.

By doing pair programming you will be able to share your technic, tips and tricks with the members of your team. It is a great way to learn new shortcuts as well, I personally learn a lot of them this way.

swcraft-pair

Refactoring legacy code

The next session was presented by Thomas and was about refactoring, in the example Thomas used the Gilded Rose refactoring kata. The goal of this kata is to simulate the need to add a new feature in an existing code base, a not so great code base with a lot of duplication.

If you are lucky there is already some tests covering the code, if not you will have to make sure that you won’t break anything while adding new code. In the session Thomas used an interesting method to make sure he won’t break the existing features: he duplicated the code to be able to refactor it without losing it. Then he gave the same inputs to the two parts and checked that the outputs were the same.

For the refactoring itself he used a “counter-intuitive” strategy: copy-pasting! The Gilde Rose code is full of if-else statement and a lot of them are redundant but it is not obvious at the first glance. Therefore the technic is to make them even more redundant to detect the parts in the code that can be refactored into methods to clean the whole code base. You make the code even worse that it already is to ease the refactoring. The concept is difficult to explain with a few sentences, seeing it in practice however is definitely counter-intuitive yet the result was very efficient, I was impressed by this strategy.

swcraft-legacy

Testing untestable code

In the previous session the code was not under test but it was testable, but we know that it is not always the case. Some code bases are tightly coupled with a database or a web service for instance, if you want to test the code you need a working database and/or a working web service.

Bruno also used a kata (from Sandro Mancuso) to demonstrate a way to get rid of these “hard” dependencies in order to test the rest of the code. The kata simulates a system using classes that cannot be used in a test context.

In this exercise the goal is to detect these dependencies and extract them so you can inject them using dependency injection and therefore you can mock them in your tests. This strategy can be frightening because in order to write tests, you first need to refactor the code and in the previous session we saw that tests give you a safety net when refactoring some code. But it this case, there is no choice, you have to do the refactoring without them so you need to be very careful and if something goes wrong you can always rollback the changes even if nobody like this “final” solution.

swcraft-untestable

Some personal thoughts

This event was definitely made as an introduction to software craftsmanship for people who have (almost) not experienced it, with a big focus on practices and not just theory. There is a lot of content I already knew, which is a good news for me I guess. But I also learned new tricks and technic allowing me to remind me that I still have a lot to learn, and that’s great!

I was also very surprised to see that about half of the attendees were not .NET developers, there was a lot of Java people (at Microsoft’s!). And this show us that the software craftsmanship movement is not technology based, it addresses everyone no matter where you come from, it is an ideal with values, a community!

I want to thank Microsoft for hosting the event, and of course I am grateful toward Jean-Laurent, Bruno and Thomas for taking the time to animate this event and spreading the values of the software craftsmanship. If you want to learn more you can visit their site learn.tocraft.fr (in french).

See you next time!

swcraft-resources


Tell Don’t Ask Principle

reported-ordersWhen working with an Object Oriented Programming (OOP) language, we design our classes based on their responsibility, following the Single Responsibility Principle (SRP) of course. We are able to use encapsulation to add behavior within these classes, unlike Procedural Programming (PP). The readability of the application components can be improved this way. Alec Sharp wrote about this topic:

Procedural code gets information then makes decisions. Object-oriented code tells objects to do things.

Am I saying that OOP is better than PP? Absolutely not, these are two different paradigms and it is important to remember this. I personally started with the procedural aspects, in C and I moved to OOP with C++ and after that I switch to C#. When I started C++ and the Object Oriented programming it was not as easy as it is now, it was a whole new “world”.

This is where the Tell Don’t Ask principle becomes handy. This principle helps you remember that you should design your components by focusing on their behavior and by hiding their internal working using encapsulation technic.

I have created an example of a component as an example to this principle. We will first take a look at the “ask” version and then we will see the “tell” version. This example is about a payment system that debit a wallet for a giving amount.

Ask version

public class Wallet
{
    public int OwnerId { get; set; }
 
    public int Balance { get; set; }
}
 
public class PaymentService
{
    public void DebitCustomer(int amount, int customerId)
    {
        var wallet = WalletRepository.GetWalletByCustomerId(customerId);
        if (wallet.Balance < amount)
            throw new Exception("Not enough funds.");
 
        wallet.Balance -= amount;
    }
 
    public void CreditCustomer(int amount, int customerId)
    {
        var wallet = WalletRepository.GetWalletByCustomerId(customerId);
        wallet.Balance += amount;
    }
}
 
public static class WalletRepository
{
    public static Wallet GetWalletByCustomerId(int customerId)
    {
        // Simulation of a query to data storage
        return new Wallet
        {
            Balance = 200,
            OwnerId = customerId
        };
    }
}

In this version my “Wallet” class is only a “data holder” and does not have a single piece of logic. It is the PaymentService that do all the work and “ask” the wallet if it has enough money to continue the operation. And it is the same service that update the wallet balance, it is not necessary the kind of behavior we might want in our application.

Now imagine that some customers are allowed to have a negative balance. In this case I do not want to throw an exception and I need to add a new condition in the DebitCustomer method.

public class Wallet
{
    public int OwnerId { get; set; }
 
    public int Balance { get; set; }
 
    public bool IsOverdraftAllowed { get; set; }
}
 
public class PaymentService
{
    public void DebitCustomer(int amount, int customerId)
    {
        var wallet = WalletRepository.GetWalletByCustomerId(customerId);
        if (wallet.Balance < amount && !wallet.IsOverdraftAllowed)
            throw new Exception("Not enough funds.");
        wallet.Balance -= amount;
    }
 
    public void CreditCustomer(int amount, int customerId)
    {
        var wallet = WalletRepository.GetWalletByCustomerId(customerId);
        wallet.Balance += amount;
    }
}

I had to modify both the Wallet class and the PaymentService class. I end up with a lot of wallet related logic in my payment service where it should only focus on debiting and crediting customers.

Now, it is time to see the tell version.

Tell version

public class Wallet
{
    public int OwnerId { get; private set; }
 
    public int Balance { get; private set; }
 
    public bool IsOverdraftAllowed { get; private set; }
 
    public Wallet(int ownerId, int balance, bool allowOverdraft)
    {
        OwnerId = ownerId;
        Balance = balance;
        IsOverdraftAllowed = allowOverdraft;
    }
 
    public void Debit(int amount)
    {
        if (Balance < amount && !IsOverdraftAllowed)
            throw new Exception("Not enough funds.");
        Balance -= amount;
    }
 
    public void Credit(int amount)
    {
        Balance += amount;
    }
}
 
public class PaymentService
{
    public void DebitCustomer(int amount, int customerId)
    {
        var wallet = WalletRepository.GetWalletByCustomerId(customerId);
        wallet.Debit(amount);
    }
 
    public void CreditCustomer(int amount, int customerId)
    {
        var wallet = WalletRepository.GetWalletByCustomerId(customerId);
        wallet.Credit(amount);
    }
}
 
public static class WalletRepository
{
    public static Wallet GetWalletByCustomerId(int customerId)
    {
        // Simulation of a query to data storage
        return new Wallet(customerId, 200, true);
    }
}

In this version, we can see that the payment service is much “cleaner” and it only focuses on its responsibility, nothing more. All the wallet logic has been moved to the Wallet class, where it belongs. And I used encapsulation to “protect” this class against unintentional uses, only the wallet instance can update its balance amount.

Tell Don’t Ask to save bandwidth

Now imagine that you have a class that act as a client for a service (like in WCF) and it calls a remote endpoint to perform a certain operation if it is available. I create the following piece of code as an example in the “ask” way.

public class RemoteService
{
    public bool IsOperationAvailable()
    {
        // some logic
        return true;
    }
 
    public void DoOperation()
    {
        // some operations
    }
}
 
public class Client
{
    public void CallRemote()
    {
        var service = new RemoteService();
        if (service.IsOperationAvailable()) // network latency here
            service.DoOperation();          // network latency again
    }
}

Even it the code does not look that “dirty”, I highlighted the issue in the comments. The client has to make two calls to the service in order to perform the desired operation. This has an effect on the application performance. In this case the “ask” approach clearly needs to be avoided.

The “Tell” approach

public class RemoteService
{
    private bool IsOperationAvailable()
    {
        // some logic
        return true;
    }
 
    public void DoOperation()
    {
        if (!IsOperationAvailable())
            return;
        // some operations
    }
}
 
public class Client
{
    public void CallRemote()
    {
        var service = new RemoteService();
        service.DoOperation();      // network latency only here
    }
}

I just made a slighty change to the code, now the client always tell the service to perform the operation and the service checks itself if the operation is available or not. This way I was able to reduce the number of calls on the network for my application without removing any functionalities.

You might wonder why I put an example like this one, that looks obvious. Simply because I have seen a similar example in a real world application. This way I wanted to show you the importance of the Tell Don’t Ask principle in some cases.

The Tell Don’t Ask principle helps you focus on the behavior of your classes and the functionalities you want them to expose. Remember that you don’t have to ask your components about their state in order to do an operation, just tell them to do it.

I hope you liked this presentation of this principle, as always, do not hesitate to share/comment/give your opinion.

See you next time!


Image credits:

https://www.englishclub.com/grammar/reported-orders.htm

Visualize your .NET code quality with NDepend

NDepend logo
NDepend logo

As a professional developer, my job is to created valuable software. And I think that one of the way to achieve this goal is by producing high quality code. It means that the coupling has to be low, the components clear and concise, the code coverage ration must be high and a lot of other things. At least this is how I defined quality when it is related to programming.

Code quality is an abstract concept and can be interpreted in several ways. You can find “best practices” depending on your programming language and paradigm. As an Object Oriented Programmer working with C# I heavily rely on the “Clean Code” concepts and the SOLID principles (more here).

Principles and concepts are mandatory for every professional developers. Yet when working on a huge code base it is difficult to know if your concepts are respected everywhere in your application. There are tools to help you with that and I had the chance to be able to test one of them, called NDepend and I will introduce it in this blog post.

What is NDepend?

NDepend is Visual Studio extension that run static analysis on your .NET solutions in order to generate metrics related to your code to help you improve the general quality of your applications. It displays these metrics using lists, graphs, matrixes, tree maps and charts. And of course it is possible to customize all of it.

How does it work?

I could try to describe every features available in this tool but instead I will just use an example to show you how it works and what it is possible to do with it.

To do the demonstration I will use a .NET solution from an open source project on GitHub called Serilog. This project is a .NET logging library easy to use and extensible.

Once I have installed NDepend and open the solution on Visual Studio I can attached a new NDepend project (.ndproj file) to the solution. Everything is achievable from the NDepend menu inside Visual Studio, you don’t need to run third-party tools.

attach-ndepend

From there I can choose the dynamic libraries (DLL) I want to analyze that exist in the solution. If I want I can exclude libraries I don’t want or that are not relevant. After this you can start the analyze right away and see the result of it after a few seconds (it is really fast). Once it is over you are able to display the dashboard which will give you an overall idea of your code quality with some metrics.

dashboard-ndepend

On this dashboard you are able to see the total number of lines of code, the number of types, the average method complexity (1.67 is definitely good). There are a lot of charts that will allow to see the evolution of some metrics over time. And there is an area dedicated to “code rules”, for the moment you can consider this as a “warning” counts, I’ll come back to this later. Of course this dashboard is customizable if you want to get rid of some metrics to put others instead.

Visualize the dependencies

Once your solution has been analyzed you can display a dependency graph at an assemblies level to have a quick look at the solution organization and to check where the external libraries are used.

dependency-graph-assemblies

For example on this graph we can see that the test project uses NUnit as testing framework and not the default one provided by Visual Studio. There are not much external dependencies.

It is also possible to generate dependency graphs at a namespace level to get a more detailed view of the solution. For the following graph I only selected namespace from the solution and not from the external libraries.

dependency-graph-namespaces

Do not worry if you think that this graph is unreadable, you can have coloration when putting your mouse over a node and you can choose to display only a portion of the graph. You can also see that there are some red edges on the graph, it means that some namespace are mutually dependent (they use each other) and therefore are highly coupled. Maybe you allow that, maybe you don’t, but this is a first indication that quality can be improved in this area.

Code rules

NDepend comes in with a huge set of code rules that aim to pinpoint the types or methods in your application that can be improved following some “best practices”. Here are the rule categories available.

rule-categories

On the left panel you can see all the rules related to the “code quality” group. The analyze have found that 2 methods might be too big and 6 methods might need some refactoring. By clicking on a rule it opens a new window giving you the details for this rule and the result.

rule-editor

This is where the real fun starts! The rules are “open-source”, they are written in a LINQ-like syntax (called CQLinq) and you can edit them at your convenience to match your needs. And of course the result in the lower panel is updated in real-time. For me this is the big feature of NDepend, you can request your code with an user-friendly API allowing you to check a huge amount of details. You can really customize the rules the way you want to match your quality requirements.

Add more visualization

The way I enjoyed the most working with NDepend is when I bind the queries editor with the tree map view. This way I can locate in the blink of an eye the parts of my project that match my query. And then I am able to see the components of my applications that match several queries. This can be a powerful indicator to track down the lack of quality. For example I will display all the methods that can have a lower visibility (it is a NDepend base rule in the “visibility” group).

treemap-view

I can see that this rule is “violated” in every projects but especially in the test project. In this case it is a false alarm, since the test methods have to be public in order to be executed by the test runner. What I can do is exclude the Serilog.Tests library from the NDepend analysis or I can update the query. Here is the original rule:

// <Name>Methods that could have a lower visibility</Name>
// This rule tells which methods can be declared with a lower visibility.
// (like 'private' is a visibility lower than 'internal' which is lower than 'public').
// Reducing visibility is a good practice because this fosters encapsulation
// and with it maintainability and extensibility.
 
warnif count > 0 from m in JustMyCode.Methods where 
  m.Visibility != m.OptimalVisibility &&
  !m.HasAttribute("NDepend.Attributes.CannotDecreaseVisibilityAttribute".AllowNoMatch()) &&
  !m.HasAttribute("NDepend.Attributes.IsNotDeadCodeAttribute".AllowNoMatch()) &&
  // If you don't want to link NDepend.API.dll, you can use your own attributes and adapt this rule.
 
  // Eliminate default constructor from the result.
  // Whatever the visibility of the declaring class,
  // default constructors are public and introduce noise
  // in the current rule.
  !( m.IsConstructor && m.IsPublic && m.NbParameters == 0) &&
 
  // Don't decrease the visibility of Main() methods.
  !m.IsEntryPoint
 
select new { m, 
             m.Visibility , 
             CouldBeDeclared = m.OptimalVisibility,
             m.MethodsCallingMe }

And now I will update it to exclude the test methods by adding the following condition:

  !m.HasAttribute("NUnit.Framework.TestAttribute".AllowNoMatch()) &&

And the tree map view is now updated.

treemap-view-updated

We can see that there is a lot less “blue” in the test area but some is remaining. And these maybe are some refactoring opportunities we would have missed if the complete DLL had been excluded.

In this blog post, I only scratch the surface. NDepend provides a lot more functionalities to improve your .NET code quality, you can find some of them in a presentation I made a few weeks ago (available here).

As a professional developer focused on software quality, NDepend is a great tool. I personally love all the visualization and the customization it provides, it is refreshing. I can create and/or reuse all the rules I want to match the level of quality I desire. And I still have a lot to discover in the potential it offers.

If you would like to know more or have some details on more specific parts of NDepend, let me know.

See you next time!

SOLID: Dependency Inversion Principle

inversion-arrowsIt is time to see the fifth and last principle of SOLID: the Dependency Inversion Principle, also known as DIP. If you missed the other principles, you can learn more about them by following these links:

When developing software you will have a lot of different modules having each their role and responsibility. You will have to connect these modules between them in order to create the desired functionalities for your system. They will have dependencies between them and it will increase the coupling between your components. So it is important to reduce the risk involved in these dependencies. This is where the DIP rules come in play:

  1. High-level modules should not depend on low-level modules. Both should depend on abstractions.
  2. Abstractions should not depend upon details. Details should depend upon abstractions.

When a high-level module (business service for instance) depends on low-level module (data validator, a repository, …) it is difficult to reuse this module because it is highly coupled.

I have created an example that violates the DIP and I will show a way to solve the issue.

public class User
{
    public string UserName { get; set; }
    // some more properties
}
 
public class UserRepository
{
    public User GetUser(string userName)
    {
        // retrieve user in Database
        return new User();
    }
}
 
public class NotificationService
{
    public void Send(string message, User user)
    {
        // populate a message with the user information
        // send the message
    }
}
 
public class MessageSender
{
    // Send a message to a specific user
    public void SendMessage(string message, string userName)
    {
        var userRepository = new UserRepository();
        var user = userRepository.GetUser(userName);
 
        var notificationService = new NotificationService();
        notificationService.Send(message, user);
    }
}

In this piece of code my high-level module is the MessageSender, it allows me to send a given message to a given user (found by its username). For example this is a class that can be used from a user interface with a form. You can see that it has dependencies on a repository and a service, a modification of one of them can have impacts on my class. And what if I want to retrieve my user through a web service instead of the database? Or if I want to be able to send message to my friend via Twitter, Facebook or another social network? I will have to add complexity in this module even if its responsibility does not change from a “business” point of view.

My code is highly coupled and violates the Dependency Inversion Principle, I have to change it and I will by using abstraction (interfaces in my case).

public interface IUserRepository
{
    User GetUser(string userName);
}
 
public class UserRepository : IUserRepository
{
    public User GetUser(string userName)
    {
        // retrieve user in Database
        return new User();
    }
}
 
public interface INotificationService
{
    void Send(string mesage, User user);
}
 
public class NotificationService : INotificationService
{
    public void Send(string message, User user)
    {
        // populate a message with the user information
        // send the message
    }
}
 
public class MessageSender
{
    public INotificationService NotificationService { get; set; }
    public IUserRepository UserRepository { get; set; }
 
    // Send a message to a specific user
    public void SendMessage(string message, string userName)
    {
        var user = UserRepository.GetUser(userName);
        NotificationService.Send(message, user);
    }
}

In this new version I only use contracts/abstractions for my high-level component and this way I reduced the coupling with the implementations of the low-level modules. I decided to expose the dependencies via properties to access them and set them in order to clean the “SendMessage” method. When using this class I can now specify if I want to use an EmailNotificationService, a TwitterNotificationService, another social network related service or even a test double if I am in a test context.

Imagine creating automated tests with the first implementation! I would have to create an actual database for my UserRepository and a STMP service for my email based NotificationService. All of this only to test this little piece of logic, with abstraction and dependency inversion it is much easier now to test my components. A few months ago I introduced a DIP pattern known as Dependency Injection, you can learn more here.

This is the end of my presentation of the Dependency Inversion Principle and the end of the SOLID principles as well. I hope you like it and do not hesitate to leave a comment if you want to improve the concepts I have introduced in these blog posts.

See you next time!

SOLID: Interface Segregation Principle

multi-cablesIn my latest posts I introduced the Single Responsibility Principle, the Open Closed Principle and the Liskov Substitution Principle of SOLID. Now it is time to see the Interface Segregation Principle (ISP). In Object Oriented Programming (OOP) abstraction is a valuable asset especially with interfaces that allow you to design your application by contracts. Even if the interfaces do not contain any actual code it is important to control their size. The following sentence defines the ISP rule:

Clients should not be forced to depend on methods they do not use.

In other words it means that you should have small dedicated interfaces instead of larger ones. This way the client code will only have access to the functionalities it needs. I have created an example to show how the ISP can be violated and how to fix it.

public interface IRepository<T> where T : class
{
    void Insert(T entity);
    void Update(T entity);
    T Get(int id);
    void Delete(int id);
}

I have this interface that represents a repository to manipulate the entities stored in my database, it has the basic CRUD (Create Read Update Delete) operations. I will use this interface on my User entity:

public class User
{
    public int Id { get; set; }
    // other properties
}
 
public class UserRepository : IRepository<User>
{
    public void Insert(User entity)
    {
        // save user in DB
    }
 
    public void Update(User entity)
    {
        // update user in DB
    }
 
    public User Get(int id)
    {
        // retrieve user from DB
        return new User();
    }
 
    public void Delete(int id)
    {
        // delete user from DB
    }
}

Good, I have now a full control over my User objects lifetime in the database. Now I also want to be able to retrieve some event logs to be able to consult them, I will use my repository interface to do so.

public class EventLog
{
    public int Id { get; set; }
    public string Message { get; set; }
    // other properties
}
 
public class LogRepository : IRepository<EventLog>
{
    public void Insert(EventLog entity)
    {
        // nothing to do
    }
 
    public void Update(EventLog entity)
    {
        // nothing to do
    }
 
    public EventLog Get(int id)
    {
        // retrieve log from DB
        return new EventLog();
    }
 
    public void Delete(int id)
    {
        // nothing to do
    }
}

The issue is that my logs are stored in the database by other applications and in the one I’m working on I don’t have any logging to do. This force me to leave 3 methods empty since they are not used but are defined in my interface… This is clearly a violation of the Interface Segregation Principle. In this example I have a repository that is “read & write” and another that is just “read”. My abstraction is not correct in my context.

I have to find a solution that allows me to keep the functionalities for both repositories without breaking the ISP. I will then create two separate interfaces:

public interface IReadRepository<T> where T : class
{
    T Get(int id);
}
 
public interface IWriteRepository<T> where T : class
{
    void Insert(T entity);
    void Update(T entity);
    void Delete(int id);
}

As you can see one is dedicated to “read” operations and the other to “write” operations. My LogRepository can now inherits the IReadRepository because it does not need anything else.

public class LogRepository : IReadRepository<EventLog>
{
    public EventLog Get(int id)
    {
        // retrieve log from data source
        return new EventLog();
    }
}

And what about the UserRepository? Since it is “read & write” it will implement both interfaces. Multiple inheritance is commonly use when the ISP is in play.

public class UserRepository : IReadRepository<User>, IWriteRepository<User>
{
    public void Insert(User entity)
    {
        // save user in DB
    }
 
    public void Update(User entity)
    {
        // update user in DB
    }
 
    public User Get(int id)
    {
        // retrieve user from DB
        return new User();
    }
 
    public void Delete(int id)
    {
        // delete user from DB
    }
}

With time my application is likely to grow and use more and more entities from the database that will need “read” and “write” operations. If it is the case I can create an IReadWriteRepository that will be defined like this:

public interface IReadWriteRepository<T> : IReadRepository<T>, IWriteRepository<T>
    where T : class
{
 
}

In my example the UserRepository can implement this interface since it works as an alias over the two other ones. The ISP does not prevent you from regrouping interfaces under a common one. This will allow your code to be “cleaner” and explicit without losing functionalities.

This is the end of the Interface Segregation Principle presentation, remember to look for partial implementations of an interface if you want to spot where the ISP is violated.

I hope you liked this 4th principle of the SOLID series and as always do not hesitate to share, comment and give your opinion.

See you next time!

SOLID: Liskov Substitution Principle

lego-duploIt is time for the third entry for the SOLID series, after the SRP and the OCP, I’ll introduce the Liskov Substitution Principle (LSP). This concept has been introduced by Barbara Liskov in 1984, with Jeannette Wing they define this principle as the following:

Let q(x) be a property provable about objects x of type T. Then q(y) should be provable for objects y of type S, where S is a subtype of T.

Well, if you are like me you must be still trying to figure this one out to understand how it can be applied to Object Oriented Programming. Do not worry, a more accessible rule has been defined to specify the LSP.

Subtypes must be substitutable for their base types.

In other words it means that consuming any implementation of a base class should not change the correctness of the system. To give more depth to this principle I will use the famous Rectangle-Square example to show how this rule can be violated.

public class Rectangle
{
    public int Width { get; set; }
    public int Length { get; set; }
    public virtual int CalculateArea()
    {
        return Width * Length;
    }
}
 
public class Square : Rectangle
{
    public override int CalculateArea()
    {
        return Width * Width;
    }
}

As you can see, the Square is a subclass of Rectangle and that makes sense since a square is a rectangle with the same width and length. Now I will use these two classes in a program:

class Program
{
    static void Main(string[] args)
    {
        Rectangle rectangle = new Square();
        rectangle.Length = 10;
        rectangle.Width = 5;
        Console.WriteLine("Area : {0}", rectangle.CalculateArea());
    }
}
Area: 25

Let me resume the situation: I have a rectangle of 10 by 5 and its area is 25?! This does not make sense. Even if the inheritance seems legitimate, the way it is used in my application violates the Liskov Substitution Principle.

Using the NotSupportedException of the .NET framework is likely showing that the LSP is not respected in your source code. There is even a part of this same framework that transgress this principle.

class Program
{
    static void Main(string[] args)
    {
        ICollection<int> collection = new ReadOnlyCollection<int>(new List<int>{1,2});
        collection.Add(3);  // throws a NotSupportedException
    }
}

The ReadOnlyCollection does not allow any modification to the collection, it is impossible to add or remove items in it. Yet its the ICollection interface that defines methods to manipulate the items: the LSP is clearly violated.

The LSP is closely related to the Design by Contract approach to create software. This way your thinking ahead of the pre-conditions,  post-conditions and side effects for your application and every implementations of your subtypes are related to your contracts.

This is the end of the introduction to the Liskov Substitution Principle and especially how to detect when the rule is broken. I am still working on a relevant example to demonstrate how to start from a “bad” code sample, like the ones I gave you, to a sample that respect the LSP.

In the meantime do not hesitate to give your opinion regarding this topic.

See you next time!

SOLID: Open Closed Principle

dutch-door

In my last entry I introduced the S of the SOLID principles: Single Responsibility Principle. Today I will move to the next letter, the O which stands for Open Closed Principle. In an agile environment, teams and projects have to be responsive to change (4th value of the agile manifesto) in order to steadily add value (2nd value of the software craftsmanship manifesto). But respecting these values can be really hard if the code of your application is not easily extensible. This is where this second principle come in play.

Software entities (classes, modules, functions, etc…) should be open for extension but closed for modification.

This is the rule for the Open Closed Principle. There are 2 key attributes in this statement and in the name of the principle as well: open & close. Even if they are in opposition this does not imply that they block each other.

The module is open for extension, this means that it can be extended with new behaviors as the requirements for the application change. Yet the module is also closed for modification, in other words it implies that you should be able to extend the functionalities of this module without modifying its source code. I know it might sound confusing and this is why I’ll show an example to explain how this principle can be used.

public class User
{
    // some properties
}
 
public class NotificationCenter
{
    public void NotifyByEmail(User user, string message)
    {
        // some email related logic
    }
 
    public void NotifyByText(User user, string message)
    {
        // some texting relating logic
    }
}

In this piece of code I created a class that allows me to send notifications to a user by email or by text. Now imagine that I want my application to notify my users using social networks… I will have to modify the source code of this class to add new behaviors and it clearly violates the OCP. I will update my class in order to change this “mistake”:

public interface INotificationService
{
    void SendMessage(User user, string message);
}
 
public class EmailNotificationService : INotificationService
{
    public void SendMessage(User user, string message)
    {
        // some email related logic
    }
}
 
public class TextNotificationService : INotificationService
{
    public void SendMessage(User user, string message)
    {
        // some texting related logic
    }
}

public class FacebookNotificationService : INotificationService
{
    public void SendMessage(User user, string message)
    {
        // some facebook related logic
    }
}
 
public class TwitterNotificationService : INotificationService
{
    public void SendMessage(User user, string message)
    {
        // some twitter related logic
    }
}
 
public class NotificationCenter
{
    public void Notify(User user, string message, INotificationService service)
    {
        // some logic
        service.SendMessage(user, message);
    }
}

My NotificationCenter now use a specific interface to do its work and I am able to add functionalities to it without changing the code. All I have to do is to implement the INotificationService to add a new behavior. By doing this I can even separate each implementation in a specific assembly and I avoid putting Facebook or Twitter dependencies in my class. For instance if the Twitter API changes and I have to change the code, I can only package and deliver the TwitterNotificationService, I don’t have to redeploy everything.

The key to the OCP is abstraction. Yet this does not mean that you have to use it everywhere, the context is important and premature abstraction may add complexity to your source code where it is not needed.

I hope you like this presentation of the Open Closed Principle for the SOLID series. You can also check this great article by Joel Abrahamsson about this principle.

See you next time!

SOLID: Single Responsibility Principle

swiss-army-knifeA blog about software craftsmanship cannot be complete without mentioning the SOLID principles. I discovered these principles about a year ago and it completely changed the way I write software and think about it. By using SOLID I feel like my code is more robust than before, more understandable, more maintainable and easier to test. Will them solve all your problems? Of course not but, in my opinion, it can definitely help you writing better crafted software. There are 5 object-oriented programming principles in SOLID:

  • Single Responsibility Principle (SRP)
  • Open Close Principle (OCP)
  • Liskov Substitution Principle (LSP)
  • Interface Segregation Principle (ISP)
  • Dependency Inversion Principle (DIP)

And today I will present the first one, the Single Responsibility Principle, by giving an example and explaining my understanding of this principle.

A class should have only one reason to change.

This is the rule of this first principle. Is that all? Yes it is, so now I will give details about the meaning of this rule and what it implies. If a class has more than one reason to change it means that this class certainly have more than one responsibility. If you are not able to describe the goal of your class with a short sentence you are most likely violating the SRP. And if your short sentence contains words like “or”, “and” or “then” you probably violates this principle as well.

I will use a basic example to demonstrate the concept of this principle. I created the following helper class:

class EmailHelper
{
    public void Validate(string email)
    {
        // some validation logic
    }
 
    public void Send(string email, string message)
    {
        // some sending logic
    }
}

So, what does this class do? I can answer by the following sentence: “This class helps manipulating email addresses”. I did use a short sentence to describe my class and without saying “and” or “or”. True, but in my opinion this is definitely imprecise and it reveals that the SRP might be violated. To describe this class I would much likely say: “This class validates email addresses and sends a message to a given address”. This is much more accurate and it shows that the class has more than one responsibility.

To respect the Single Responsibility Principle, I will create two different classes having each its own responsibility:

class EmailValidator
{
    public void Validate(string email)
    {
        // some validation logic
    }
}
 
class EmailSender
{
    public void Send(string email, string message)
    {
        // some sending logic
    }
}

I now have a class that validates a given email address and another that sends a message to an email address. I can now use the validation logic without having the sending logic in the same “area”. I know that my example might look mundane and sometimes it is much more difficult to tell if the SRP is violated or not. I can only advise you to keep the rule in mind to tell if you are respecting the SRP.

I hope you like this introduction to the Single Responsibility Principle from SOLID. And as always do not hesitate to share your opinion on this topic.

If you want to know more about the SRP and the SOLID principles I recommend to acquire the “Agile Principles, Patterns and Practices in C#” book by Robert “Uncle Bob” Martin and Micah Martin.

See you next time!

The Null Object Pattern

empty-frameIn a lot of object-oriented programming languages there is a moment where we have to deal with null pointers/references/objects. These references must be checked to avoid any exception that might end the program in an unexpected way or moment. I think that most of us have encountered this type of error at least once in our lives. Tony Hoare said that the introduction of the null reference is its “billion-dollar mistake”. Yet sometimes it is possible to avoid the use of null pointer in our application by using the Null Object Pattern.

The intent of this pattern is to provide a specific implementation of an abstraction by doing nothing, it is used to replace manipulation of undefined references (null) when it can be and is therefore predictable (again, it does nothing).

I have created the following piece of code, in C#, to show how it can be done.

public class User
{
    public enum NotificationTypes
    {
        Email,
        Text,
        Twitter,
        None
    }
 
    public string Name { get; set; }
 
    public NotificationTypes NotificationPreference { get; set; }
}
public interface INotifier
{
    void Notify(User user, string message);
}
 
public class EmailNotifier : INotifier
{
    public void Notify(User user, string message)
    {
        Console.WriteLine("Hello {0}, {1} - sent by email", user.Name, message);
    }
}
 
public class TextNotifier : INotifier
{
    public void Notify(User user, string message)
    {
        Console.WriteLine("Hello {0}, {1} - sent by text", user.Name, message);
    }
}
 
public class TwitterNotifier : INotifier
{
    public void Notify(User user, string message)
    {
        Console.WriteLine("Hello {0}, {1} - sent by twitter", user.Name, message);
    }
}
 
public static class NotifierFactory
{
    public static INotifier CreateNotifier(User user)
    {
        switch (user.NotificationPreference)
        {
            case User.NotificationTypes.Email:
                return new EmailNotifier();
            case User.NotificationTypes.Text:
                return new TextNotifier();
            case User.NotificationTypes.Twitter:
                return new TwitterNotifier();
        }
        return null;
    }
}
static void Main(string[] args)
{
    var bob = new User { Name = "Bob", NotificationPreference = User.NotificationTypes.Email };
    var john = new User { Name = "John", NotificationPreference = User.NotificationTypes.Text };
    var martin = new User { Name = "Martin", NotificationPreference = User.NotificationTypes.Twitter };
    var jeff = new User { Name = "Jeff", NotificationPreference = User.NotificationTypes.None };
 
    var users = new List<User> { bob, john, martin, jeff };
 
    foreach (var user in users)
    {
        var notifier = NotifierFactory.CreateNotifier(user);
        if (notifier != null)
        {
            notifier.Notify(user, "This is a message");
        }
    }
}

In this example, a message is sent to several users using the notification system they prefer. And they can turn off the notification system by choosing the “None” option and in this case the Notifier instance returned by the factory is null and force us to put a check in the calling code to avoid any NullReferenceException. As you can see, if the Notifier is null there is no particular behavior, this is a sign that the Null Object Pattern might be used. To use this pattern, the first thing to do is to add a new implementation of INotifier:

public class NullNotifier : INotifier
{
    public void Notify(User user, string message)
    {
        // Nothing to do
    }
}

I can now update my factory to return an instance of this new class instead of null:

public static class NotifierFactory
{
    private static INotifier NullNotifier = new NullNotifier();
 
    public static INotifier CreateNotifier(User user)
    {
        switch (user.NotificationPreference)
        {
            case User.NotificationTypes.Email:
                return new EmailNotifier();
            case User.NotificationTypes.Text:
                return new TextNotifier();
            case User.NotificationTypes.Twitter:
                return new TwitterNotifier();
        }
        return NotifierFactory.NullNotifier;
    }
}

Since the Null Object Pattern is stateless, it is common to use it as a Singleton, this is why I used a static field to hold the reference to the pattern. I can now clean the caller code by removing the null check:

static void Main(string[] args)
{
    var bob = new User { Name = "Bob", NotificationPreference = User.NotificationTypes.Email };
    var john = new User { Name = "John", NotificationPreference = User.NotificationTypes.Text };
    var martin = new User { Name = "Martin", NotificationPreference = User.NotificationTypes.Twitter };
    var jeff = new User { Name = "Jeff", NotificationPreference = User.NotificationTypes.None };
 
    var users = new List<User> { bob, john, martin, jeff };
 
    foreach (var user in users)
    {
        var notifier = NotifierFactory.CreateNotifier(user);
        notifier.Notify(user, "This is a message");
    }
}

Now my application has the same behavior as before and is cleaner. With the Null Object Pattern I have been able to remove a check for a null reference in my code without losing any functionality. This pattern may look like a test double but its purpose is not for testing, it’s for production code and match a case of the domain model: in my example the absence of notification is a deliberated choice.

The Null Object Pattern is often used with the Factory pattern (like in my example). You should consider this pattern if you have null check over an abstraction that does not trigger any behavior.

I hope you like this presentation of the Null Object Pattern, and as always do not hesitate to comment.

See you next time!

Model validation in ASP .NET MVC

form-validation

I worked for several years as an ASP .NET MVC developer and I still do even if I do less front-end development at the moment. During my professional life I came across a few tips for this technology that helped me making my code cleaner and less coupled.

Before creating this blog I owned another one in french where I posted a few articles related to Model validation for a form. I will expose the concept of these articles in this new blog post, in english this time. Maybe it will look obvious for you but I wish I knew these tips when I started working with ASP .NET MVC and this is why I’m creating this blog entry, it might help some of you.

The problem

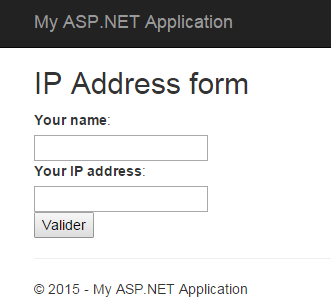
I created the following form for example, which ask for a name and an IP address:

I created this form using a new empty MVC application in Visual Studio and here is the Index.cshtml view:

@model CodingTips.Web.Models.IPAddressModel
 
<h2>IP Address form</h2>
@using (Html.BeginForm())
{
    @Html.AntiForgeryToken()
    <div>
        @Html.LabelFor(m => Model.Name):
    </div>
    <div>
        @Html.TextBoxFor(m => Model.Name)
        @Html.ValidationMessageFor(m => Model.Name)
    </div>
    <div>
        @Html.LabelFor(m => Model.IPAddress):
    </div>
    <div>
        @Html.TextBoxFor(m => Model.IPAddress)
        @Html.ValidationMessageFor(m => Model.IPAddress)
    </div>
    <input type="submit" />
}

The Model and the Controller are defined the following way at the moment:

public class IPAddressModel
{
    [Required]
    [Display(Name = "Your name")]
    public string Name { get; set; }
 
    [Required]
    [Display(Name = "Your IP address")]
    public string IPAddress { get; set; }
}
 
public class HomeController : Controller
{
    [HttpGet]
    public ActionResult Index()
    {
        return View();
    }
 
    [HttpPost]
    [ValidateAntiForgeryToken]
    public ActionResult Index(IPAddressModel model)
    {
        if (!ModelState.IsValid)
        {
            return View(model);
        }
 
        return RedirectToAction("Validate");
    }
 
    [HttpGet]
    public string Validate()
    {
        return "Your IP address has been registered";
    }
}

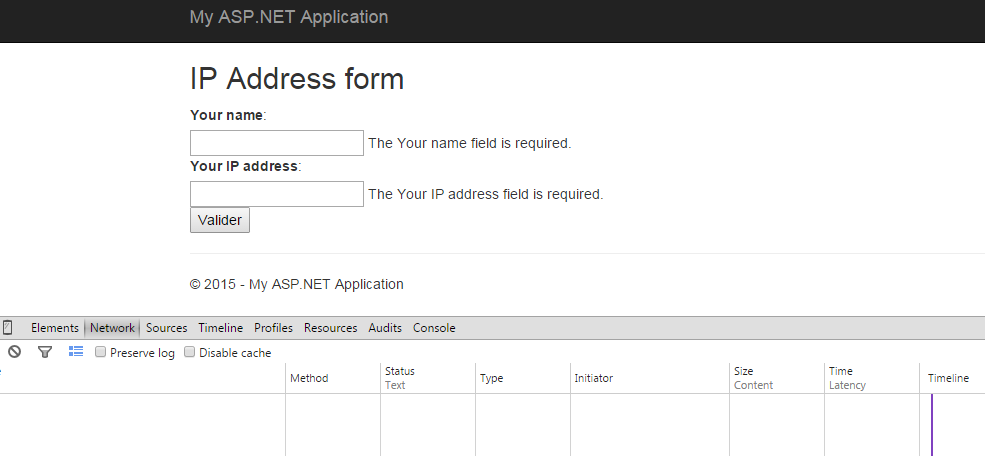
As you can see I already put some validation logic that will only verify that the fields are not left empty. If the user fill the two text boxes he will be redirected to a page containing only a confirmation message, this is the final result.

But, as you probably guessed it, there are issues with this validation code, the IP address field can be filled with any string value and the Model will be valid. This is not what we desire, we want a more accurate validation for this field and this is what I will show in this article.

When I began working with ASP .NET MVC my first thought, when I encountered an issue like this one, was to add all the validation logic inside the POST action of the Controller. Well, it can work but this is not the place to do so, this option increase the code coupling especially when the Model to validate is huge. In my opinion the Controller should only take care of the “flow” logic of the application and the validation should be placed somewhere else.

The good news is that ASP .NET MVC has been designed to be extensible for Model validation in an easy way. Let’s see how this can be done.

IValidatableObject

It is possible to add validation at the class-level, directly on the Model itself by implementing a specific interface: IValidatableObject. There is only one method available in this interface, the Validate() method. It will be automatically called by the MVC framework when the ModelState.IsValid code is executed, which is already present in our Controller. Let’s see the new version of the Model:

public class IPAddressModel : IValidatableObject
{
    [Required]
    [Display(Name = "Your name")]
    public string Name { get; set; }
 
    [Required]
    [Display(Name = "Your IP address")]
    public string IPAddress { get; set; }
 
    public IEnumerable<ValidationResult> Validate(ValidationContext validationContext)
    {
        const string regexPattern = @"^([\d]{1,3}\.){3}[\d]{1,3}$";
        var regex = new Regex(regexPattern);
 
        if (!regex.IsMatch(IPAddress))
            yield return new ValidationResult("IP address format is invalid", new[] { "IPAddress" });
    }
}

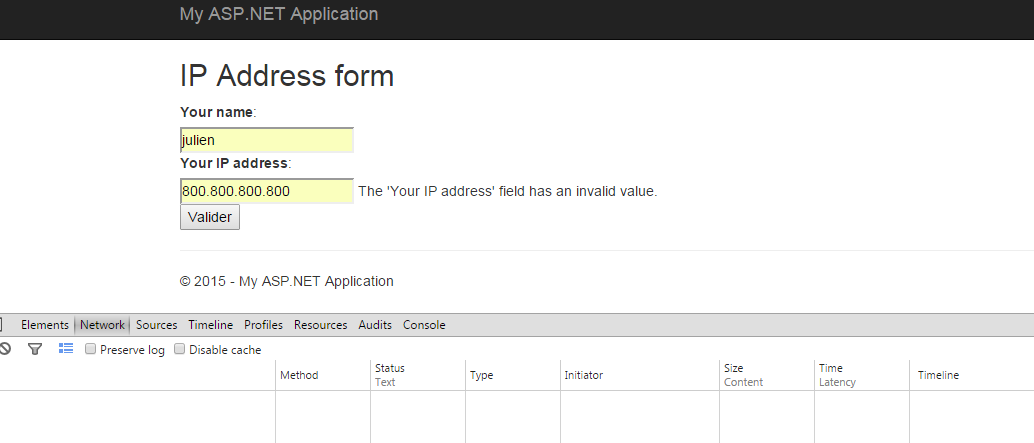
In this first implementation of the Validate() method I simply check that the given address match an IP V4 format (xxx.xxx.xxx.xxx). I have nothing else to do before being able to test this new behavior in my form.

ip-address-format-error

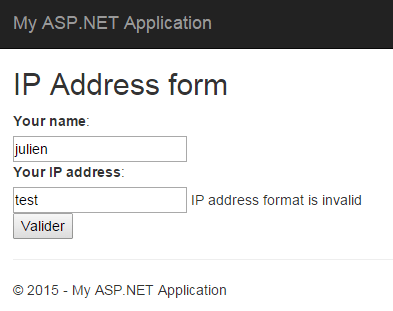
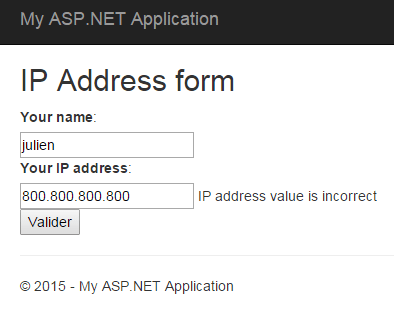
It works as expected. Yet, the validation is not over since I can put the value 800.800.800.800 (which is not valid for an IP address) without having any error, there is more validation to do:

public IEnumerable<ValidationResult> Validate(ValidationContext validationContext)
{
    const string regexPattern = @"^([\d]{1,3}\.){3}[\d]{1,3}$";
    var regex = new Regex(regexPattern);
 
    if (!regex.IsMatch(IPAddress))
        yield return new ValidationResult("IP address format is invalid", new[] { "IPAddress" });
 
    string[] values = IPAddress.Split(new[] { '.' }, StringSplitOptions.RemoveEmptyEntries);
 
    byte ipByteValue;
    foreach (string token in values)
    {
        if (!byte.TryParse(token, out ipByteValue))
            yield return new ValidationResult("IP address value is incorrect", new[] { "IPAddress" });
    }
}

I extended the Validate() method in order to add more logic and to check that each element of the IP address has a correct value. I did this by checking that each of them can be transformed into a byte (value from 0 to 255).

ip-address-value-error

By using the IValidatableObject interface I was able to add validation logic to my Model without modifying my Controller. Doing so can be helpful when you have validation logic that depends on several properties of the Model.

In our example I used this interface only to check a single property and therefore it can look a bit “overpowered”. And if I have another form with a IP address field I will need to extract this part of the logic into a specific method to avoid code duplication. This point leads me to my next tip.

Custom attribute

To add validation to a specific field, the IP address one in our case, my advice will be to create a custom validation attribute. This will allow me to put the validation logic in one place only. Here’s the attribute implementation:

public class IpAddressAttribute : RegularExpressionAttribute
{
    public IpAddressAttribute()
        : base(@"^([\d]{1,3}\.){3}[\d]{1,3}$")
    {}
 
    public override bool IsValid(object value)
    {
        if (!base.IsValid(value))
            return false;
 
        string ipValue = value as string;
        if (IsIpAddressValid(ipValue))
            return true;
 
        return false;
    }
 
    private bool IsIpAddressValid(string ipAddress)
    {
        if (string.IsNullOrEmpty(ipAddress))
            return false;
 
        string[] values = ipAddress.Split(new[] { '.' }, StringSplitOptions.RemoveEmptyEntries);
 
        byte ipByteValue;
        foreach (string token in values)
        {
            if (!byte.TryParse(token, out ipByteValue))
                return false;
        }
 
        return true;
    }
 
    public override string FormatErrorMessage(string name)
    {
        return string.Format("The '{0}' field has an invalid format.", name);
    }
}

The logic is exactly the same as the one present in the IValidatableObject chapter. First checking the overall format with a regular expression and this is why I created a RegularExpressionAttribute subtype. Then the value of each byte is checked. Now I can use this attribute on my Model:

public class IPAddressModel
{
    [Required]
    [Display(Name = "Your name")]
    public string Name { get; set; }
 
    [IpAddress]
    [Required]
    [Display(Name = "Your IP address")]
    public string IPAddress { get; set; }
}

The Controller is unchanged, the Model is much cleaner and I can easily reuse my attribute for each IP address property in my application models without duplicating the logic.

My Model is now fully checked but only on the server-side, and this validation can clearly be done on the client-side as well with some JavaScript. This will avoid unnecessary HTTP requests between the browser and the server.

jQuery validation

ASP .NET now integrates a lot of third-party JavaScript libraries and among them there is jQuery which we will use to achieve client-side validation. I updated the _Layout.cshtml view to add the following lines:

<script src="http://ajax.aspnetcdn.com/ajax/jQuery/jquery-2.1.3.min.js"></script>
<script src="http://ajax.aspnetcdn.com/ajax/jquery.validate/1.13.0/jquery.validate.min.js"></script>
<script src="http://ajax.aspnetcdn.com/ajax/mvc/5.1/jquery.validate.unobtrusive.min.js"></script>

You can find different versions of these script here if you need specific ones. You also have to check that the Web.config is configured in order to enable client-side validation with jQuery:

<configuration>
  <appSettings>
    <add key="ClientValidationEnabled" value="true"/>
    <add key="UnobtrusiveJavaScriptEnabled" value="true"/>
  </appSettings>
  ...
</configuration>

I can test the form again and see what is happening.

ip-address-jquery

The data have been checked without posting them to the server. This is possible because the @Html.TextBoxFor() method has generated the following HTML for the IP address field:

<input data-val="true" data-val-required="The Your IP address field is required." id="IPAddress" name="IPAddress" type="text" value="" aria-required="true" class="input-validation-error" aria-describedby="IPAddress-error IPAddress-error" aria-invalid="true">

The data-val-* attributes (HTML5) are used by the jquery.validate plugin to perform the client-side validation. But as you can see, there is nothing related to our regular expression pattern we defined for the IPAddressAttribute. And if you try to validate the form with an invalid IP address the form will still be posted to the server. At the moment the client-site validation is not complete.

IClientValidatable

ASP .NET MVC allow us to extend the generated HTML in order to add more control over the fields in the form. For that I will make the IpAddressAttribute implementing the IClientValidatable interface.

public class IpAddressAttribute : RegularExpressionAttribute, IClientValidatable
{
    public IpAddressAttribute()
        : base(@"^([\d]{1,3}\.){3}[\d]{1,3}$")
    {}
 
    public override bool IsValid(object value)
    {
        // does not change
        ...
    }
 
    private bool IsIpAddressValid(string ipAddress)
    {
        // does not change
        ...
    }
 
    public override string FormatErrorMessage(string name)
    {
        return string.Format("The '{0}' field has an invalid format.", name);
    }
 
    public IEnumerable<ModelClientValidationRule> GetClientValidationRules(ModelMetadata metadata, ControllerContext context)
    {
        string fieldName = metadata.DisplayName;
        string errorMessage = string.Format("The '{0}' field has an invalid format.", fieldName);
        const string pattern = @"^([\d]{1,3}\.){3}[\d]{1,3}$";
 
        ModelClientValidationRegexRule patternRule = new ModelClientValidationRegexRule(errorMessage, pattern);
        yield return patternRule;
 
        ModelClientValidationRule ipRule = new ModelClientValidationRule();
        ipRule.ValidationType = "ipformat";
        ipRule.ErrorMessage = string.Format("The '{0}' field has an invalid value.", fieldName);
 
        yield return ipRule;
    }
}

This method adds two new validation rule for the client-side code. The first one is for the regular expression and I use the existing ModelClientValidationRegexRule class to do so. The second one is a custom ModelClientValidationRule for which I defined the type as “ipformat”. This means that the input in the form will have a data-val-ipformat attribute.

This attribute is not recognized by the jQuery validation plugin, so I created a IPFormat.js file to extend it:

$.validator.unobtrusive.adapters.addBool("ipformat");
 
$.validator.addMethod("ipformat", function (value, element) {
    if (!value) {
        return false;
    }
    var bytes = value.split(".");
    if (bytes.length != 4) {
        return false;
    }
    for (i in bytes) {
        var entry = bytes[i];
        if (!entry) {
            return false;
        }
        var byte = parseInt(entry);
        if (isNaN(byte) || byte < 0 || byte > 255){
            return false;
        }
    }
    return true;
});

After including this file in my _Layout.cshtm view, I can see that the generated HTML for the text box has changed.

<script src="~/Scripts/Validators/IPFormat.js"></script>
<input data-val="true" data-val-ipformat="The 'Your IP address' field has an invalid value." data-val-regex="The 'Your IP address' field has an invalid format." data-val-regex-pattern="^([\d]{1,3}\.){3}[\d]{1,3}$" data-val-required="The Your IP address field is required." id="IPAddress" name="IPAddress" type="text" value="" aria-required="true" aria-invalid="true" class="input-validation-error" aria-describedby="IPAddress-error">

I now have my attributes for the regular expression validation and for the ipformat validation. Let’s try the form once again.

ip-address-jquery-custom

Here we are, the IP address is fully checked without being sent to the server. To achieve this I only used functionalities present in the framework, such as the IValidatableObject interface, the custom validation attributes, the IClientValidatable interface and a bit of jQuery.

This is the end of this blog post about Model validation in ASP .NET MVC on both server-side and client-side. I hope this will help you and as usual do not hesitate to comment and share this.

See you next time!