Book Review: Notes to a Software Team Leader

notes-to-software-leader-coverIn the career of a professional developer there is a time where we are asked not only to produce high quality software but also to become a leader for our team. And this new task requires different skills in order to be achieved, being a leader is not easy and it can definitely be frightening.

In this blog post I will not share my experience regarding this topic. Why? Simply because, when writing these lines, I am not a software team leader. And therefore I cannot give you tips for an experience I have not yet lived.

This article will be about a book that shares the experience of an actual team leader: Roy Osherove. In his book, “Notes to a Software Team Leader“, Roy explains the concept of the elastic leadership and also what are the 3 phases in which a software development team can be.

Why did I read this book?

You might wonder why I read this book about software leadership since I am not a team leader. And I asked myself the same question before reading the book. Well, maybe one day I will be asked to take the role of a leader in a software development team.

I am the kind of person who likes to plan ahead and therefore I decided to read this book about the responsibilities I might have one day. By doing so I will be able to have ideas about what will await me for this challenge.

Also, the two senior developers of my team read the book and they referred to its content. They spoke about comfort zone, commitment language and others topics. And it made me curious, so I decided to read the book to able to understand what they were talking about. And after doing it I was able to understand a bit more their situation and mine as well in the team.

In some software development teams there is no formal team leader, there are only programmers which have to work with each others in order to complete the tasks they have. And sometimes you are the most experienced developer of the team in the company and even if you did not ask for it, you are kind of the leader.

I went through short periods like these ones during my career and it can be stressful because you just don’t know how to behave when facing some situations. Reading the book can be helpful to understand in which phase you currently are and how to get out of it.

Elastic Leadership

The “ultimate” style of leadership just does not exist. If it does we would all know it by now. To be an effective leader you will have to adapt to the context you are working in, the work environment, the personalities within the team and everything that can have an impact on your team. Your leadership has to be “elastic” and you have to adapt it depending on the situation.

In “Notes to a Software Team Leader”, Roy Osherove describes 3 different kinds of leadership: command-and-control leadership, coaching leadership and facilitating leadership.

In a command-and-control mode, the team leader tries to solve everyone’s problem. This looks commendable for your team but it can also prevents your team members to learn anything since you are doing all the work.

The “coach” leader is great at teaching new things to others. He will let you experienced new things and sometimes let you do some mistakes if there are lessons to learn. This mode is helpful for your team but in some situations you can’t do it because your don’t have time for it, there are too many fires to put out.

The facilitator leader stays out-of-the-way. He makes sure that the environment is optimal for its team and relies on the skills on the team members to get things done. This type of leadership cannot be achieved if the developers are not experienced enough to face the challenges they have to deal with.

These three leadership styles can be applied to different phases that a team can encountered during the lifetime of a project.

Survival phase

Does your team spend its days on putting out fires? There is absolutely no time for learning new technologies and technics? Then you probably are in the survival mode.

Even if does not look like the kind of environment you want for your team it can be appealing to stay in it. Why? Because day after day you will do the same kind of work, the kind of work that feel “safe” because you have already done it, several times. You are in your comfort zone even if there are fires everyday.

To get out of this phase, you have to break the circle by providing slack time dedicated to learning. By gaining new skills the team members will be able to deal with more issues they have to face.

For example they can learn about refactoring technics in order to decrease the technical debt of the project. They can learn how to add unit tests to the source code.

You should not see these learning opportunities as a waste of time but as an investment in your team.

The survival phase is the time where command-and-control management can be helpful. You take control of the ship to avoid sinking and you give orders. To correct previously made bad decisions, to avoid mistakes you know will happen. Your job is to get the team out of the survival mode, to aim for the learning phase.

Learning phase

In this phase, the focus is on gaining new skills. The project is more stable than it was during survival phase and you now have time to spend on improving things.

You are no longer needed to apply a command-and-control type of management, you now need to act as a coach. Helping your coworkers to learn is your goal.

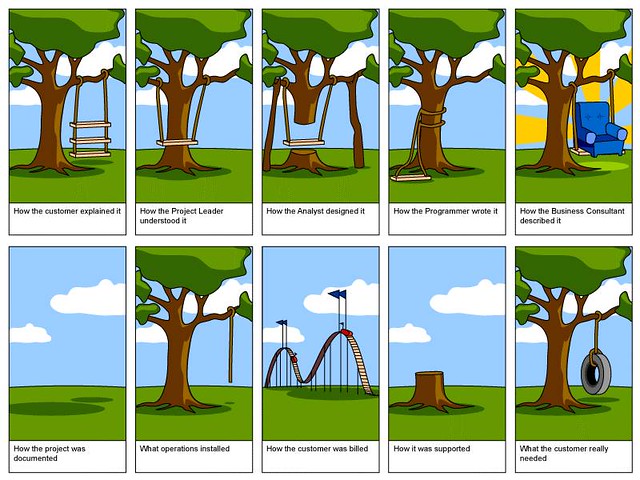
When learning you are not increasing your productivity at a constant rate, the curve is more like the one shown on the graph below.

Learning Rate With Ravines

There are ravines before each peak, they are adjustment phases and they might seem painful because your productivity is decreasing. Yet you should embrace them because they are leading you to new paradigms, skills and knowledge, you are stepping outside of your comfort zone.

The learning phase is the perfect time to teach about commitment language. When you will do something, you mean it and you will actually do it! I wrote an article about “saying yes” a while back, where it is all about commitment.

You also have to teach your team to start dealing with its own problems, the one you were dealing with during the previous phase. When a new issue is raised by a member of your team you should give them the following answer: “What will you do about it?“.

This question aims to make the members take actions in order to deal with the challenges they are facing everyday. And they of course have to answer the question using commitment language.

But what if the solution is not in our hands? Then in which hands is it? What prevents you from speaking to this person/team to explain your issue?

Even if in a lot of situations we cannot fix our problems alone, this does not mean that we are powerless. There is always an action that can be done by ourself to get closer to the “fixed” state for our issue.

During the learning phase, the team leader has to focus on the autonomy of its team to make it self-organized.

Self organization phase

When the team enters the self-organization phase, you can follow the facilitating kind of leadership. You act as a guide and remind your team the concept they learned during the learning phase, such as the commitment language.

You do not have much to do, you give your teams goals and after that you just get out of their way. They should know how to deal with the challenges they will face. They will learn the skills they need in order to get things done.

During this phase there is not much else for you to do.

Conclusion

As a software team leader, I think that your job is to strive to create self-organized teams. In a way you have to make yourself “unnecessary” by making your team autonomous. Don’t worry, this is a long and fastidious work so you won’t be unemployed just after a few months. And when you reach this goal, you can take another team stuck in the survival phase and grow the people working in it. There are a lot of software development teams that need your help!

This is just an overview of the book content and I can only encourage you to read it to learn more. I think that it is not only intended to be read by team leaders but also by every professional programmers who is interested by the phases a software development team can be in.

See you next time!

The Law of Demeter

demeterDo not let the title mislead you, today’s article is not about greek mythology. As always I will speak about software development. In my last article I introduced the Tell Don’t Ask principle where it was about object behavior using encapsulation. The Law of Demeter (LoD) is an Object Oriented Programming (OOP) design guideline that fits well with this last principle. This practice uses encapsulation in order to reduce coupling between your components, and therefore it helps you improve your code quality. Here is a definition for the LoD:

Each unit should have only limited knowledge about other units: only units “closely” related to the current unit. Or: Each unit should only talk to its friends; Don’t talk to strangers.

For OOP it can be described with the followings list, which I consider easier to digest:

A method of an object may only call methods of:

  1. The object itself.
  2. An argument of the method.
  3. Any object created within the method.
  4. Any direct properties/fields of the object.

I will now demonstrate the use of the LoD with an example in C#. I will use the famous “The Paperboy and the Wallet” case from the original paper about the Demeter practice. In this example, the paperboy get a payment from a customer who as a wallet.

Initial situation

public class Wallet
{
    public float Value { get; set; }
 
    public void AddMoney(float amount)
    {
        Value += amount;
    }
 
    public void SubMoney(float amount)
    {
        Value -= amount;
    }
}
 
public class Customer
{
    public string FirstName { get; set; }
 
    public string LastName { get; set; }
 
    public Wallet Wallet { get; set; }
}
 
public class Paperboy
{
    public void SellPaper(Customer customer)
    {
        var payment = 2.0f;
        var wallet = customer.Wallet;
        if (wallet.Value >= payment)
        {
            wallet.SubMoney(payment);
        }
        else
        {
            // come back later
        }
    }
}

The Wallet class just stores its amount and exposes two methods to manipulate this amount. A customer has a first name, last name and a wallet. And finally the paperboy sell its good to a given customer using its wallet.

The problems

To me, it does not really looks like a real world scenario, I personally don’t give my wallet to every person I must pay. The paperboy knows that the customer has a wallet and he is able to manipulate it, this can be seen as a Single Responsibility Principle violation. And nothing prevents the paperboy code to do something like this:

customer.Wallet = null;

And maybe the customer’s wallet is already null, and therefore the paperboy’s method has to add a null check to avoid unwanted NullReferenceException.

public void SellPaper(Customer customer)
{
    var payment = 2.0f;
    var wallet = customer.Wallet;
    if (wallet != null)
    {
        if (wallet.Value >= payment)
        {
            wallet.SubMoney(payment);
        }
        else
        {
            // come back later
        }
    }
}

For a simple functionality, I think my code starts to look “heavier” than it should. A modification of the Wallet class will result in an update in the Paperboy class as well, the 3 classes are tightly coupled and it is unnecessary. The paperboy just wants to be paid, no matter if the money comes from a wallet or something else.

Following the Law of Demeter

I will now rewrite the code to fix the previous issues. To do so I will use encapsulation and add a PayAmount() method to the Customer class.

public class Wallet
{
    public Wallet(float initialAmount)
    {
        Value = initialAmount;
    }
 
    public float Value { get; private set; }
 
    public void AddMoney(float amount)
    {
        Value += amount;
    }
 
    public void SubMoney(float amount)
    {
        Value -= amount;
    }
}
 
public class Customer
{
    public Customer()
    {
        FirstName = "John";
        LastName = "Doe";
        _wallet = new Wallet(20.0f); // amount set to 20 for example
    }
 
    public string FirstName { get; private set; }
 
    public string LastName { get; private set; }
 
    private Wallet _wallet;
 
    public float PayAmount(float amountToPay)
    {
        if (_wallet.Value >= amountToPay)
        {
            _wallet.SubMoney(amountToPay);
            return amountToPay;
        }
        return 0;
    }
}
 
public class Paperboy
{
    public void SellPaper(Customer customer)
    {
        var payment = 2.0f;
        var amountPaid = customer.PayAmount(payment);
        if (amountPaid != payment)
        {
            // come back later
        }
    }
}

Now, the paperboy can only access to the first name and last name of the customer, without being able to modify them (for invoicing purposes for example). And he can tell the later to pay a certain amount for the paper without knowing that the money comes from a wallet, the LoD is also known as the principle of least knowledge. The relationship between the Paperboy class and the Wallet class has been removed, the code is less coupled.

With my refactoring, I increased the readability and the maintainability of my code without losing any functionality.

More than simple dot counting

Sometimes the Law of Demeter is stated with a simple phrase: “use only one dot“. This aims to focus on avoiding lines like the following, from the initial example:

customer.Wallet.Value;
customer.Wallet.SubMoney();

The risk with doing this is that you can have a NullReferenceException if the Wallet instance is not initialized, in these examples I used 2 dots. And here it is an indication that the LoD is violated.

But this is not always the case and this is why I consider that the rule should not be sum up to the simple “only one dot” principle. When working with the .NET framework and especially with Linq, it is easier to chain the calls and it has been designed to be used that way. I don’t consider that the following code sample breaks the LoD even if I use more than one dot.

enumerable.Where(o => o.LastName == "Doe").Select(o => o.FirstName).ToList();

The LoD is about loose coupling and encapsulation, it is not about dot counting.

This is the end of my presentation of the Law of Demeter, which I use a lot to avoid unnecessary coupling in my code. Remember that when working with an OOP language you are able to control the way you design your components to expose only what is required and nothing more.

See you next time!


Image credits:

http://sterendenn.deviantart.com/art/Art-Nouveau-Demeter-255076200

Tell Don’t Ask Principle

reported-ordersWhen working with an Object Oriented Programming (OOP) language, we design our classes based on their responsibility, following the Single Responsibility Principle (SRP) of course. We are able to use encapsulation to add behavior within these classes, unlike Procedural Programming (PP). The readability of the application components can be improved this way. Alec Sharp wrote about this topic:

Procedural code gets information then makes decisions. Object-oriented code tells objects to do things.

Am I saying that OOP is better than PP? Absolutely not, these are two different paradigms and it is important to remember this. I personally started with the procedural aspects, in C and I moved to OOP with C++ and after that I switch to C#. When I started C++ and the Object Oriented programming it was not as easy as it is now, it was a whole new “world”.

This is where the Tell Don’t Ask principle becomes handy. This principle helps you remember that you should design your components by focusing on their behavior and by hiding their internal working using encapsulation technic.

I have created an example of a component as an example to this principle. We will first take a look at the “ask” version and then we will see the “tell” version. This example is about a payment system that debit a wallet for a giving amount.

Ask version

public class Wallet
{
    public int OwnerId { get; set; }
 
    public int Balance { get; set; }
}
 
public class PaymentService
{
    public void DebitCustomer(int amount, int customerId)
    {
        var wallet = WalletRepository.GetWalletByCustomerId(customerId);
        if (wallet.Balance < amount)
            throw new Exception("Not enough funds.");
 
        wallet.Balance -= amount;
    }
 
    public void CreditCustomer(int amount, int customerId)
    {
        var wallet = WalletRepository.GetWalletByCustomerId(customerId);
        wallet.Balance += amount;
    }
}
 
public static class WalletRepository
{
    public static Wallet GetWalletByCustomerId(int customerId)
    {
        // Simulation of a query to data storage
        return new Wallet
        {
            Balance = 200,
            OwnerId = customerId
        };
    }
}

In this version my “Wallet” class is only a “data holder” and does not have a single piece of logic. It is the PaymentService that do all the work and “ask” the wallet if it has enough money to continue the operation. And it is the same service that update the wallet balance, it is not necessary the kind of behavior we might want in our application.

Now imagine that some customers are allowed to have a negative balance. In this case I do not want to throw an exception and I need to add a new condition in the DebitCustomer method.

public class Wallet
{
    public int OwnerId { get; set; }
 
    public int Balance { get; set; }
 
    public bool IsOverdraftAllowed { get; set; }
}
 
public class PaymentService
{
    public void DebitCustomer(int amount, int customerId)
    {
        var wallet = WalletRepository.GetWalletByCustomerId(customerId);
        if (wallet.Balance < amount && !wallet.IsOverdraftAllowed)
            throw new Exception("Not enough funds.");
        wallet.Balance -= amount;
    }
 
    public void CreditCustomer(int amount, int customerId)
    {
        var wallet = WalletRepository.GetWalletByCustomerId(customerId);
        wallet.Balance += amount;
    }
}

I had to modify both the Wallet class and the PaymentService class. I end up with a lot of wallet related logic in my payment service where it should only focus on debiting and crediting customers.

Now, it is time to see the tell version.

Tell version

public class Wallet
{
    public int OwnerId { get; private set; }
 
    public int Balance { get; private set; }
 
    public bool IsOverdraftAllowed { get; private set; }
 
    public Wallet(int ownerId, int balance, bool allowOverdraft)
    {
        OwnerId = ownerId;
        Balance = balance;
        IsOverdraftAllowed = allowOverdraft;
    }
 
    public void Debit(int amount)
    {
        if (Balance < amount && !IsOverdraftAllowed)
            throw new Exception("Not enough funds.");
        Balance -= amount;
    }
 
    public void Credit(int amount)
    {
        Balance += amount;
    }
}
 
public class PaymentService
{
    public void DebitCustomer(int amount, int customerId)
    {
        var wallet = WalletRepository.GetWalletByCustomerId(customerId);
        wallet.Debit(amount);
    }
 
    public void CreditCustomer(int amount, int customerId)
    {
        var wallet = WalletRepository.GetWalletByCustomerId(customerId);
        wallet.Credit(amount);
    }
}
 
public static class WalletRepository
{
    public static Wallet GetWalletByCustomerId(int customerId)
    {
        // Simulation of a query to data storage
        return new Wallet(customerId, 200, true);
    }
}

In this version, we can see that the payment service is much “cleaner” and it only focuses on its responsibility, nothing more. All the wallet logic has been moved to the Wallet class, where it belongs. And I used encapsulation to “protect” this class against unintentional uses, only the wallet instance can update its balance amount.

Tell Don’t Ask to save bandwidth

Now imagine that you have a class that act as a client for a service (like in WCF) and it calls a remote endpoint to perform a certain operation if it is available. I create the following piece of code as an example in the “ask” way.

public class RemoteService
{
    public bool IsOperationAvailable()
    {
        // some logic
        return true;
    }
 
    public void DoOperation()
    {
        // some operations
    }
}
 
public class Client
{
    public void CallRemote()
    {
        var service = new RemoteService();
        if (service.IsOperationAvailable()) // network latency here
            service.DoOperation();          // network latency again
    }
}

Even it the code does not look that “dirty”, I highlighted the issue in the comments. The client has to make two calls to the service in order to perform the desired operation. This has an effect on the application performance. In this case the “ask” approach clearly needs to be avoided.

The “Tell” approach

public class RemoteService
{
    private bool IsOperationAvailable()
    {
        // some logic
        return true;
    }
 
    public void DoOperation()
    {
        if (!IsOperationAvailable())
            return;
        // some operations
    }
}
 
public class Client
{
    public void CallRemote()
    {
        var service = new RemoteService();
        service.DoOperation();      // network latency only here
    }
}

I just made a slighty change to the code, now the client always tell the service to perform the operation and the service checks itself if the operation is available or not. This way I was able to reduce the number of calls on the network for my application without removing any functionalities.

You might wonder why I put an example like this one, that looks obvious. Simply because I have seen a similar example in a real world application. This way I wanted to show you the importance of the Tell Don’t Ask principle in some cases.

The Tell Don’t Ask principle helps you focus on the behavior of your classes and the functionalities you want them to expose. Remember that you don’t have to ask your components about their state in order to do an operation, just tell them to do it.

I hope you liked this presentation of this principle, as always, do not hesitate to share/comment/give your opinion.

See you next time!


Image credits:

https://www.englishclub.com/grammar/reported-orders.htm

I am a Coding Journeyman

Journeyman

You may have notice it, I changed the domain name for this blog a few weeks ago. Following the advice of John Sonmez on his blogging course, I decided to choose a new name for my website matching the personal brand I’m working on: Coding Journeyman.

I chose this name because it is related to the software craftsmanship movement and its values. I also like the fact that it contains the word “journey” (even if the origin is different) since I consider this personal website as a travel blog for the skills I learned during my software developer’s life.

What is a coding journeyman?

The first time I encountered the word “journeyman” in a context of software development was in the book wrote by Robert “Uncle Bob” Martin named “The Clean Coder”. I really enjoyed this book, I even started this blog with a full presentation of it, chapter by chapter. This is how Robert Martin defines the journeymen in his book:

These are programmers who are trained, competent, and energetic. During this period of their career they will learn to work in a team and to become team leaders. They are knowledgeable about current technology but typically lack experience with many diverse systems. They tend to know one language, one system, one platform; but they are learning more. Experience levels vary widely among their ranks, but the average is about five years. On the far side of that average we have burgeoning masters; on the near side we have recent apprentices.

When writing these lines, I consider  that it is a very accurate description of my actual situation regarding my professional skills. I believe I am more knowledgeable than an apprentice but I still have a lot to learn before becoming master. And I hope I will never have the arrogance to call myself a master, because I think that there will always be something new to learn.

My journey through quality

As a software developer I consider that my job is to produce applications with a high level of quality. I want to be proud of my creation and I want them to be valuable for whomever will use them, I want them to have meaning. I want to improve my skills to avoid the following “situations”.

software-project-swing

It might look funny, yet I personally don’t want to work in a similar environment. I don’t want to be a code laborer, I want to be a “value contributor” by producing high standard applications.

Then, what is quality in the software industry? This is definitely a good question and a difficult one. I believe that every programmer has its own definition for this notion. I will give my personal opinion regarding this question.

Code quality

As a professional developer my main activity is to write, update, refactor code. This is why I believe it is important to be able to do all of this easily without breaking anything. To improve your code base there are a lot a good practices to follow in order to produce testable and maintainable algorithms. There are the “Clean Code” values and I recently wrote about the SOLID principles.

I am also quite fund of automated unit testing, because I consider this is the best way to protect your code against mistakes when you are refactoring a piece of your code base. It helps you to understand how the classes and methods of your application are supposed to behave. It is also helpful to execute a specific component of your code in order to check its functionalities (while debugging for example) without launching your entire system.

Collaboration

Except if you are working alone it is likely you have to communicate with other people in order to complete your tasks. You probably share your office with other developers, and you probably have to work with them from time to time. Pair-programming is a great habit to know how to work with them, it also helps you to share your knowledge regarding practices, principles, tricks and tips. You are also able to share your understanding of the business domain your working on.

As programmers, understanding the needs of our business expert is a priority since they know how to provide value to the customers better than we do. We cannot allow ourselves to be in conflict with them, we have to understand their priorities and we also have to make them understand ours. This can be difficult from time to time but I believe that it is mandatory to work as a whole in order to produce the best products.

In my opinion code quality and collaboration are the two main areas to work on in order to craft valuable software. This way you are able to have a working and maintainable product answering the needs of your customers. Of course there are many more topics that deserve attention as well and I will write articles about them as well.

And for you? What is your definition of quality when it comes to software development?

See you next time!


Images credits:

http://www.quickenloans.com/blog/winter-vacations-7-types-travelers

How new solutions are born by artist unknown

Visualize your .NET code quality with NDepend

NDepend logo
NDepend logo

As a professional developer, my job is to created valuable software. And I think that one of the way to achieve this goal is by producing high quality code. It means that the coupling has to be low, the components clear and concise, the code coverage ration must be high and a lot of other things. At least this is how I defined quality when it is related to programming.

Code quality is an abstract concept and can be interpreted in several ways. You can find “best practices” depending on your programming language and paradigm. As an Object Oriented Programmer working with C# I heavily rely on the “Clean Code” concepts and the SOLID principles (more here).

Principles and concepts are mandatory for every professional developers. Yet when working on a huge code base it is difficult to know if your concepts are respected everywhere in your application. There are tools to help you with that and I had the chance to be able to test one of them, called NDepend and I will introduce it in this blog post.

What is NDepend?

NDepend is Visual Studio extension that run static analysis on your .NET solutions in order to generate metrics related to your code to help you improve the general quality of your applications. It displays these metrics using lists, graphs, matrixes, tree maps and charts. And of course it is possible to customize all of it.

How does it work?

I could try to describe every features available in this tool but instead I will just use an example to show you how it works and what it is possible to do with it.

To do the demonstration I will use a .NET solution from an open source project on GitHub called Serilog. This project is a .NET logging library easy to use and extensible.

Once I have installed NDepend and open the solution on Visual Studio I can attached a new NDepend project (.ndproj file) to the solution. Everything is achievable from the NDepend menu inside Visual Studio, you don’t need to run third-party tools.

attach-ndepend

From there I can choose the dynamic libraries (DLL) I want to analyze that exist in the solution. If I want I can exclude libraries I don’t want or that are not relevant. After this you can start the analyze right away and see the result of it after a few seconds (it is really fast). Once it is over you are able to display the dashboard which will give you an overall idea of your code quality with some metrics.

dashboard-ndepend

On this dashboard you are able to see the total number of lines of code, the number of types, the average method complexity (1.67 is definitely good). There are a lot of charts that will allow to see the evolution of some metrics over time. And there is an area dedicated to “code rules”, for the moment you can consider this as a “warning” counts, I’ll come back to this later. Of course this dashboard is customizable if you want to get rid of some metrics to put others instead.

Visualize the dependencies

Once your solution has been analyzed you can display a dependency graph at an assemblies level to have a quick look at the solution organization and to check where the external libraries are used.

dependency-graph-assemblies

For example on this graph we can see that the test project uses NUnit as testing framework and not the default one provided by Visual Studio. There are not much external dependencies.

It is also possible to generate dependency graphs at a namespace level to get a more detailed view of the solution. For the following graph I only selected namespace from the solution and not from the external libraries.

dependency-graph-namespaces

Do not worry if you think that this graph is unreadable, you can have coloration when putting your mouse over a node and you can choose to display only a portion of the graph. You can also see that there are some red edges on the graph, it means that some namespace are mutually dependent (they use each other) and therefore are highly coupled. Maybe you allow that, maybe you don’t, but this is a first indication that quality can be improved in this area.

Code rules

NDepend comes in with a huge set of code rules that aim to pinpoint the types or methods in your application that can be improved following some “best practices”. Here are the rule categories available.

rule-categories

On the left panel you can see all the rules related to the “code quality” group. The analyze have found that 2 methods might be too big and 6 methods might need some refactoring. By clicking on a rule it opens a new window giving you the details for this rule and the result.

rule-editor

This is where the real fun starts! The rules are “open-source”, they are written in a LINQ-like syntax (called CQLinq) and you can edit them at your convenience to match your needs. And of course the result in the lower panel is updated in real-time. For me this is the big feature of NDepend, you can request your code with an user-friendly API allowing you to check a huge amount of details. You can really customize the rules the way you want to match your quality requirements.

Add more visualization

The way I enjoyed the most working with NDepend is when I bind the queries editor with the tree map view. This way I can locate in the blink of an eye the parts of my project that match my query. And then I am able to see the components of my applications that match several queries. This can be a powerful indicator to track down the lack of quality. For example I will display all the methods that can have a lower visibility (it is a NDepend base rule in the “visibility” group).

treemap-view

I can see that this rule is “violated” in every projects but especially in the test project. In this case it is a false alarm, since the test methods have to be public in order to be executed by the test runner. What I can do is exclude the Serilog.Tests library from the NDepend analysis or I can update the query. Here is the original rule:

// <Name>Methods that could have a lower visibility</Name>
// This rule tells which methods can be declared with a lower visibility.
// (like 'private' is a visibility lower than 'internal' which is lower than 'public').
// Reducing visibility is a good practice because this fosters encapsulation
// and with it maintainability and extensibility.
 
warnif count > 0 from m in JustMyCode.Methods where 
  m.Visibility != m.OptimalVisibility &&
  !m.HasAttribute("NDepend.Attributes.CannotDecreaseVisibilityAttribute".AllowNoMatch()) &&
  !m.HasAttribute("NDepend.Attributes.IsNotDeadCodeAttribute".AllowNoMatch()) &&
  // If you don't want to link NDepend.API.dll, you can use your own attributes and adapt this rule.
 
  // Eliminate default constructor from the result.
  // Whatever the visibility of the declaring class,
  // default constructors are public and introduce noise
  // in the current rule.
  !( m.IsConstructor && m.IsPublic && m.NbParameters == 0) &&
 
  // Don't decrease the visibility of Main() methods.
  !m.IsEntryPoint
 
select new { m, 
             m.Visibility , 
             CouldBeDeclared = m.OptimalVisibility,
             m.MethodsCallingMe }

And now I will update it to exclude the test methods by adding the following condition:

  !m.HasAttribute("NUnit.Framework.TestAttribute".AllowNoMatch()) &&

And the tree map view is now updated.

treemap-view-updated

We can see that there is a lot less “blue” in the test area but some is remaining. And these maybe are some refactoring opportunities we would have missed if the complete DLL had been excluded.

In this blog post, I only scratch the surface. NDepend provides a lot more functionalities to improve your .NET code quality, you can find some of them in a presentation I made a few weeks ago (available here).

As a professional developer focused on software quality, NDepend is a great tool. I personally love all the visualization and the customization it provides, it is refreshing. I can create and/or reuse all the rules I want to match the level of quality I desire. And I still have a lot to discover in the potential it offers.

If you would like to know more or have some details on more specific parts of NDepend, let me know.

See you next time!

Starting a blog

home-officeThe first time I was thinking of creating a blog was about 5 years ago, when I was still in computer science school. At the moment it felt like a really good way to get noticed and it is. But the main concern I had at that time was: I don’t know anything to blog about, there were already blog posts about everything.

What I learned since then is that it is not true and it does not matter! A blog aims to show what you are able to do and what are the topics you like.

I finally created my first technical blog about a year and a half ago (yes, that’s a long time after my first mention of a blog). It was in french and mostly focused on web development with ASP .NET MVC. I wrote 5 articles in 5 months… And after that I drop it. I did not have a main theme for it therefore I did not have much ideas for the articles. And at the end I was not motivated to write posts. I did not consider this experience as a failure but more as a learning opportunity.

In august 2014 I decided to fight back by creating a new blog, in english this time (you are reading it) with a more defined theme. I had more motivation to post articles because I had ideas. I’ve been able to post more frequently in comparison of my first blog even if I chose to use a language different from my native one.

I passed another milestone in february this year. I subscribed to John Sonmez (creator of SimpleProgrammer.com) email course on how to create a successful blog. You can access this course by following this link: Create a blog that boosts your career.

Well, I already owned a blog, I did not need to know how to create one. But since it’s free I tested it to see if I could get some interesting advises for my personal website. By subscribing you will receive lessons every monday and thursday with an exercise to complete for each lesson. I liked this format, it provides a good pace.

The first thing to know when creating a blog is to have a main theme for the articles you will write. I lacked this for my first blog and I can only approved this.

The second lesson to learn when creating a blog is to create it! Just launch it, do not be afraid. Thinking of creating a blog is good, doing it is better. You don’t have to wait for 4 years like I did. And since you have a theme, you can register a domain name to match it.

Not having ideas for your blog can be deadly for your site, I experienced that as well. So this is why it is important to have a list of topics with all the subject you want to blog about. When you have an idea, put it in your list. It does not mean you will have to blog about it but it can give you other ideas. I personally use an online kanban board (with KanbanFlow) to keep track of all my ideas, it allows me to access it rapidly and to add new topic whenever I want. You can see my personal list on the screenshot below, it will let you have an idea of what I will blog about in the future.

kanban-list

Consistency is also important when posting articles, commit yourself to a posting schedule. When you visit a blog with no update for several months, it is likely that you will think that this blog is dead.

John Sonmez provides more lessons in is course and this is why I encouraged you to sign up if you want to start a blog but you don’t really know how or if you have doubts about it. Even if I already had a blog when I did it myself I learned valuable things, for free!

Having a successful blog is not easy, it demands time and effort but it is rewarding. At the moment, I don’t consider my blog as a successful one but I own all the keys to make this a reality. And what I know for sure is that I really enjoy posting on my new blog. It helps me improving my writing skills and learning new topics.

See you next time!

SOLID: Dependency Inversion Principle

inversion-arrowsIt is time to see the fifth and last principle of SOLID: the Dependency Inversion Principle, also known as DIP. If you missed the other principles, you can learn more about them by following these links:

When developing software you will have a lot of different modules having each their role and responsibility. You will have to connect these modules between them in order to create the desired functionalities for your system. They will have dependencies between them and it will increase the coupling between your components. So it is important to reduce the risk involved in these dependencies. This is where the DIP rules come in play:

  1. High-level modules should not depend on low-level modules. Both should depend on abstractions.
  2. Abstractions should not depend upon details. Details should depend upon abstractions.

When a high-level module (business service for instance) depends on low-level module (data validator, a repository, …) it is difficult to reuse this module because it is highly coupled.

I have created an example that violates the DIP and I will show a way to solve the issue.

public class User
{
    public string UserName { get; set; }
    // some more properties
}
 
public class UserRepository
{
    public User GetUser(string userName)
    {
        // retrieve user in Database
        return new User();
    }
}
 
public class NotificationService
{
    public void Send(string message, User user)
    {
        // populate a message with the user information
        // send the message
    }
}
 
public class MessageSender
{
    // Send a message to a specific user
    public void SendMessage(string message, string userName)
    {
        var userRepository = new UserRepository();
        var user = userRepository.GetUser(userName);
 
        var notificationService = new NotificationService();
        notificationService.Send(message, user);
    }
}

In this piece of code my high-level module is the MessageSender, it allows me to send a given message to a given user (found by its username). For example this is a class that can be used from a user interface with a form. You can see that it has dependencies on a repository and a service, a modification of one of them can have impacts on my class. And what if I want to retrieve my user through a web service instead of the database? Or if I want to be able to send message to my friend via Twitter, Facebook or another social network? I will have to add complexity in this module even if its responsibility does not change from a “business” point of view.

My code is highly coupled and violates the Dependency Inversion Principle, I have to change it and I will by using abstraction (interfaces in my case).

public interface IUserRepository
{
    User GetUser(string userName);
}
 
public class UserRepository : IUserRepository
{
    public User GetUser(string userName)
    {
        // retrieve user in Database
        return new User();
    }
}
 
public interface INotificationService
{
    void Send(string mesage, User user);
}
 
public class NotificationService : INotificationService
{
    public void Send(string message, User user)
    {
        // populate a message with the user information
        // send the message
    }
}
 
public class MessageSender
{
    public INotificationService NotificationService { get; set; }
    public IUserRepository UserRepository { get; set; }
 
    // Send a message to a specific user
    public void SendMessage(string message, string userName)
    {
        var user = UserRepository.GetUser(userName);
        NotificationService.Send(message, user);
    }
}

In this new version I only use contracts/abstractions for my high-level component and this way I reduced the coupling with the implementations of the low-level modules. I decided to expose the dependencies via properties to access them and set them in order to clean the “SendMessage” method. When using this class I can now specify if I want to use an EmailNotificationService, a TwitterNotificationService, another social network related service or even a test double if I am in a test context.

Imagine creating automated tests with the first implementation! I would have to create an actual database for my UserRepository and a STMP service for my email based NotificationService. All of this only to test this little piece of logic, with abstraction and dependency inversion it is much easier now to test my components. A few months ago I introduced a DIP pattern known as Dependency Injection, you can learn more here.

This is the end of my presentation of the Dependency Inversion Principle and the end of the SOLID principles as well. I hope you like it and do not hesitate to leave a comment if you want to improve the concepts I have introduced in these blog posts.

See you next time!

SOLID: Interface Segregation Principle

multi-cablesIn my latest posts I introduced the Single Responsibility Principle, the Open Closed Principle and the Liskov Substitution Principle of SOLID. Now it is time to see the Interface Segregation Principle (ISP). In Object Oriented Programming (OOP) abstraction is a valuable asset especially with interfaces that allow you to design your application by contracts. Even if the interfaces do not contain any actual code it is important to control their size. The following sentence defines the ISP rule:

Clients should not be forced to depend on methods they do not use.

In other words it means that you should have small dedicated interfaces instead of larger ones. This way the client code will only have access to the functionalities it needs. I have created an example to show how the ISP can be violated and how to fix it.

public interface IRepository<T> where T : class
{
    void Insert(T entity);
    void Update(T entity);
    T Get(int id);
    void Delete(int id);
}

I have this interface that represents a repository to manipulate the entities stored in my database, it has the basic CRUD (Create Read Update Delete) operations. I will use this interface on my User entity:

public class User
{
    public int Id { get; set; }
    // other properties
}
 
public class UserRepository : IRepository<User>
{
    public void Insert(User entity)
    {
        // save user in DB
    }
 
    public void Update(User entity)
    {
        // update user in DB
    }
 
    public User Get(int id)
    {
        // retrieve user from DB
        return new User();
    }
 
    public void Delete(int id)
    {
        // delete user from DB
    }
}

Good, I have now a full control over my User objects lifetime in the database. Now I also want to be able to retrieve some event logs to be able to consult them, I will use my repository interface to do so.

public class EventLog
{
    public int Id { get; set; }
    public string Message { get; set; }
    // other properties
}
 
public class LogRepository : IRepository<EventLog>
{
    public void Insert(EventLog entity)
    {
        // nothing to do
    }
 
    public void Update(EventLog entity)
    {
        // nothing to do
    }
 
    public EventLog Get(int id)
    {
        // retrieve log from DB
        return new EventLog();
    }
 
    public void Delete(int id)
    {
        // nothing to do
    }
}

The issue is that my logs are stored in the database by other applications and in the one I’m working on I don’t have any logging to do. This force me to leave 3 methods empty since they are not used but are defined in my interface… This is clearly a violation of the Interface Segregation Principle. In this example I have a repository that is “read & write” and another that is just “read”. My abstraction is not correct in my context.

I have to find a solution that allows me to keep the functionalities for both repositories without breaking the ISP. I will then create two separate interfaces:

public interface IReadRepository<T> where T : class
{
    T Get(int id);
}
 
public interface IWriteRepository<T> where T : class
{
    void Insert(T entity);
    void Update(T entity);
    void Delete(int id);
}

As you can see one is dedicated to “read” operations and the other to “write” operations. My LogRepository can now inherits the IReadRepository because it does not need anything else.

public class LogRepository : IReadRepository<EventLog>
{
    public EventLog Get(int id)
    {
        // retrieve log from data source
        return new EventLog();
    }
}

And what about the UserRepository? Since it is “read & write” it will implement both interfaces. Multiple inheritance is commonly use when the ISP is in play.

public class UserRepository : IReadRepository<User>, IWriteRepository<User>
{
    public void Insert(User entity)
    {
        // save user in DB
    }
 
    public void Update(User entity)
    {
        // update user in DB
    }
 
    public User Get(int id)
    {
        // retrieve user from DB
        return new User();
    }
 
    public void Delete(int id)
    {
        // delete user from DB
    }
}

With time my application is likely to grow and use more and more entities from the database that will need “read” and “write” operations. If it is the case I can create an IReadWriteRepository that will be defined like this:

public interface IReadWriteRepository<T> : IReadRepository<T>, IWriteRepository<T>
    where T : class
{
 
}

In my example the UserRepository can implement this interface since it works as an alias over the two other ones. The ISP does not prevent you from regrouping interfaces under a common one. This will allow your code to be “cleaner” and explicit without losing functionalities.

This is the end of the Interface Segregation Principle presentation, remember to look for partial implementations of an interface if you want to spot where the ISP is violated.

I hope you liked this 4th principle of the SOLID series and as always do not hesitate to share, comment and give your opinion.

See you next time!

SOLID: Liskov Substitution Principle

lego-duploIt is time for the third entry for the SOLID series, after the SRP and the OCP, I’ll introduce the Liskov Substitution Principle (LSP). This concept has been introduced by Barbara Liskov in 1984, with Jeannette Wing they define this principle as the following:

Let q(x) be a property provable about objects x of type T. Then q(y) should be provable for objects y of type S, where S is a subtype of T.

Well, if you are like me you must be still trying to figure this one out to understand how it can be applied to Object Oriented Programming. Do not worry, a more accessible rule has been defined to specify the LSP.

Subtypes must be substitutable for their base types.

In other words it means that consuming any implementation of a base class should not change the correctness of the system. To give more depth to this principle I will use the famous Rectangle-Square example to show how this rule can be violated.

public class Rectangle
{
    public int Width { get; set; }
    public int Length { get; set; }
    public virtual int CalculateArea()
    {
        return Width * Length;
    }
}
 
public class Square : Rectangle
{
    public override int CalculateArea()
    {
        return Width * Width;
    }
}

As you can see, the Square is a subclass of Rectangle and that makes sense since a square is a rectangle with the same width and length. Now I will use these two classes in a program:

class Program
{
    static void Main(string[] args)
    {
        Rectangle rectangle = new Square();
        rectangle.Length = 10;
        rectangle.Width = 5;
        Console.WriteLine("Area : {0}", rectangle.CalculateArea());
    }
}
Area: 25

Let me resume the situation: I have a rectangle of 10 by 5 and its area is 25?! This does not make sense. Even if the inheritance seems legitimate, the way it is used in my application violates the Liskov Substitution Principle.

Using the NotSupportedException of the .NET framework is likely showing that the LSP is not respected in your source code. There is even a part of this same framework that transgress this principle.

class Program
{
    static void Main(string[] args)
    {
        ICollection<int> collection = new ReadOnlyCollection<int>(new List<int>{1,2});
        collection.Add(3);  // throws a NotSupportedException
    }
}

The ReadOnlyCollection does not allow any modification to the collection, it is impossible to add or remove items in it. Yet its the ICollection interface that defines methods to manipulate the items: the LSP is clearly violated.

The LSP is closely related to the Design by Contract approach to create software. This way your thinking ahead of the pre-conditions,  post-conditions and side effects for your application and every implementations of your subtypes are related to your contracts.

This is the end of the introduction to the Liskov Substitution Principle and especially how to detect when the rule is broken. I am still working on a relevant example to demonstrate how to start from a “bad” code sample, like the ones I gave you, to a sample that respect the LSP.

In the meantime do not hesitate to give your opinion regarding this topic.

See you next time!

SOLID: Open Closed Principle

dutch-door

In my last entry I introduced the S of the SOLID principles: Single Responsibility Principle. Today I will move to the next letter, the O which stands for Open Closed Principle. In an agile environment, teams and projects have to be responsive to change (4th value of the agile manifesto) in order to steadily add value (2nd value of the software craftsmanship manifesto). But respecting these values can be really hard if the code of your application is not easily extensible. This is where this second principle come in play.

Software entities (classes, modules, functions, etc…) should be open for extension but closed for modification.

This is the rule for the Open Closed Principle. There are 2 key attributes in this statement and in the name of the principle as well: open & close. Even if they are in opposition this does not imply that they block each other.

The module is open for extension, this means that it can be extended with new behaviors as the requirements for the application change. Yet the module is also closed for modification, in other words it implies that you should be able to extend the functionalities of this module without modifying its source code. I know it might sound confusing and this is why I’ll show an example to explain how this principle can be used.

public class User
{
    // some properties
}
 
public class NotificationCenter
{
    public void NotifyByEmail(User user, string message)
    {
        // some email related logic
    }
 
    public void NotifyByText(User user, string message)
    {
        // some texting relating logic
    }
}

In this piece of code I created a class that allows me to send notifications to a user by email or by text. Now imagine that I want my application to notify my users using social networks… I will have to modify the source code of this class to add new behaviors and it clearly violates the OCP. I will update my class in order to change this “mistake”:

public interface INotificationService
{
    void SendMessage(User user, string message);
}
 
public class EmailNotificationService : INotificationService
{
    public void SendMessage(User user, string message)
    {
        // some email related logic
    }
}
 
public class TextNotificationService : INotificationService
{
    public void SendMessage(User user, string message)
    {
        // some texting related logic
    }
}

public class FacebookNotificationService : INotificationService
{
    public void SendMessage(User user, string message)
    {
        // some facebook related logic
    }
}
 
public class TwitterNotificationService : INotificationService
{
    public void SendMessage(User user, string message)
    {
        // some twitter related logic
    }
}
 
public class NotificationCenter
{
    public void Notify(User user, string message, INotificationService service)
    {
        // some logic
        service.SendMessage(user, message);
    }
}

My NotificationCenter now use a specific interface to do its work and I am able to add functionalities to it without changing the code. All I have to do is to implement the INotificationService to add a new behavior. By doing this I can even separate each implementation in a specific assembly and I avoid putting Facebook or Twitter dependencies in my class. For instance if the Twitter API changes and I have to change the code, I can only package and deliver the TwitterNotificationService, I don’t have to redeploy everything.

The key to the OCP is abstraction. Yet this does not mean that you have to use it everywhere, the context is important and premature abstraction may add complexity to your source code where it is not needed.

I hope you like this presentation of the Open Closed Principle for the SOLID series. You can also check this great article by Joel Abrahamsson about this principle.

See you next time!